Garage door sensors play a critical role in maintaining the safety and operational integrity of your garage door system. Positioned near the base of the door on either side, these sensors emit an invisible beam of infrared light. When functioning correctly, they detect any object or obstruction in the path of the closing door. If the beam is interrupted, the sensors signal the garage door opener to halt operation, preventing the door from closing and potentially causing harm or damage. This proactive safety feature not only protects vehicles and property from accidental collisions but also safeguards against injuries to pets, children, or anyone in the vicinity of the garage door.
This comprehensive guide is designed to walk you through the precise steps necessary to replace garage door sensors effectively. Whether your current sensors are malfunctioning, misaligned, or damaged, understanding how to properly replace them ensures continued safety and peace of mind. By following these instructions, you’ll be equipped to maintain the optimal functionality of your garage door, minimizing the risk of accidents and ensuring reliable operation for years to come.
What You Need to Know Before Replacing Garage Sensors
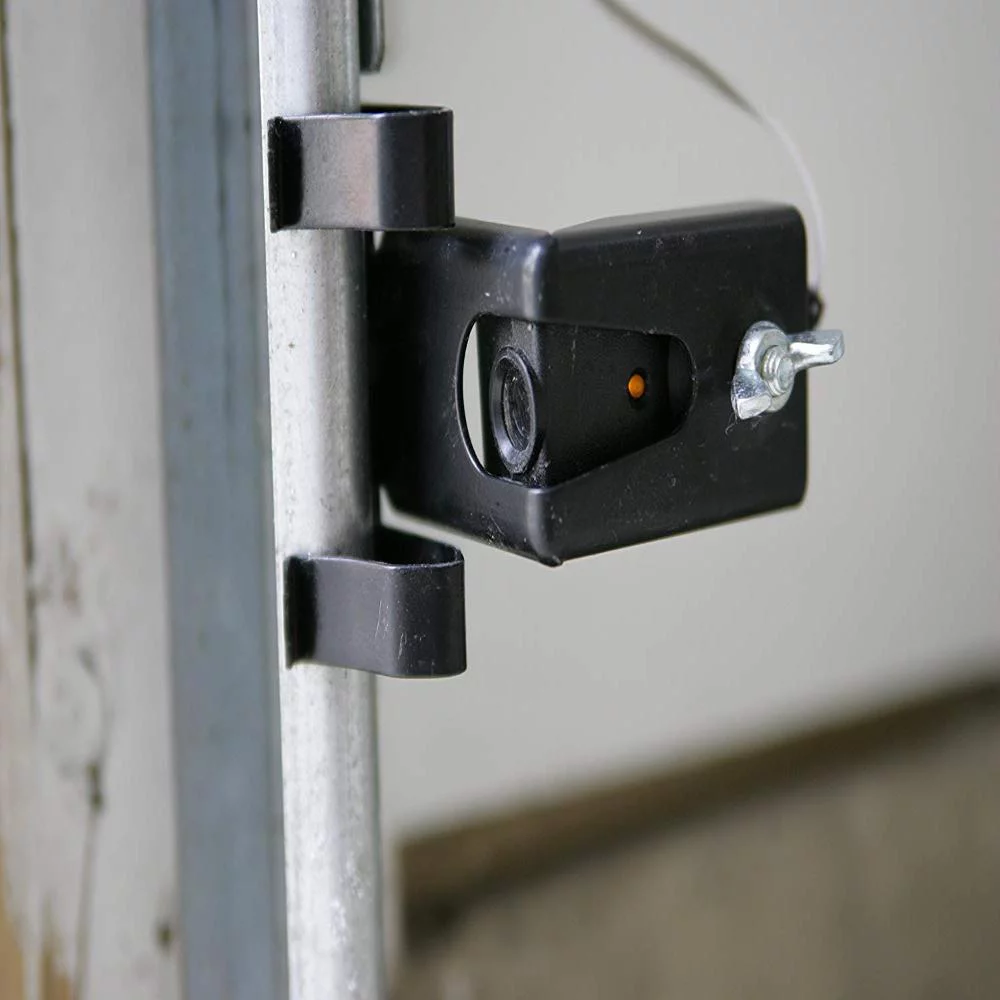
Before replacing garage door sensors, it’s crucial to understand their fundamental operation and role in garage door safety. These sensors are typically installed on either side of the garage door opening, emitting an infrared beam between them. The beam serves to detect any obstruction in the door’s path as it closes. When the beam is interrupted, the sensors send a signal to the garage door opener to stop and reverse its motion, preventing accidents and damage. Properly functioning sensors are essential for ensuring the safe operation of your garage door system and protecting vehicles, property, and individuals from potential harm.
Understanding how garage door sensors function underscores their significance in maintaining safety and efficiency. By grasping their basic mechanics, you’ll appreciate why keeping them in optimal condition is vital. Regular inspection and timely replacement of malfunctioning or misaligned sensors ensure that your garage door continues to operate smoothly and safely, providing peace of mind for you and your family.
Ensuring Proper Alignment of Garage Door Sensors
Proper sensor alignment is crucial for garage door safety and functionality. Sensors emit an infrared beam that triggers the door opener to stop and reverse when disrupted by an object. Correct alignment ensures sensors detect obstacles accurately, preventing accidents and damage. Misalignment can lead to ineffective sensor operation, failing to detect objects, causing unexpected malfunctions.
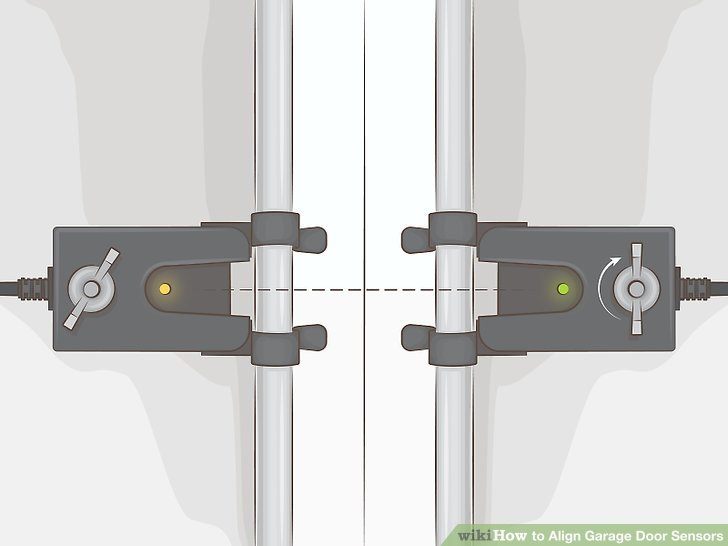
Alignment ensures sensors reliably detect obstacles in the door’s path, reducing risks to vehicles, property, and individuals. Misaligned sensors may overlook obstacles and interrupt door operation. Inspect sensor alignment to ensure they face each other across the door opening without obstructions. Adjust mounting brackets and use a level to align sensors properly. Test functionality by closing the door and interrupting the beam with an object. Secure brackets tightly to hold sensors in place once alignment is satisfactory.
How to Identify When to Replace a Garage Door Sensor
Identifying when to replace a garage door sensor involves recognizing certain signs that indicate potential issues. One clear indication is if your garage door frequently reverses direction while closing, especially when there are no visible obstructions present. This behavior suggests that the sensors may be misaligned, dirty, or malfunctioning, hindering their ability to detect obstacles.
Another sign is visible damage to the sensors, such as cracks in the housing or broken wires, which can impair their functionality. Additionally, if the indicator light on your garage door opener blinks continuously or exhibits unusual patterns, it may indicate a communication problem between the sensors and the opener. Addressing these signs promptly by replacing the sensors ensures that your garage door operates safely and efficiently, reducing the risk of accidents and enhancing overall functionality.
Guide on How to Replace Garage Door Sensors
Replacing garage door sensors is a task that ensures the continued safety and functionality of your garage door system. These sensors play a crucial role in detecting obstructions and preventing the door from closing on objects or individuals. Below is a step-by-step guide to help you replace garage door sensors effectively:
Step 1: Ensure You Have All the Equipment You Need
Before starting the replacement process, gather all the necessary tools and replacement sensors. You’ll typically need a screwdriver (Phillips and flat-head), wire strippers, electrical tape, and new sensors compatible with your garage door opener model. Having these tools ready will streamline the installation and ensure you have everything on hand to complete the job.
Step 2: Disconnect the Garage Sensor from the Power Source
Safety is paramount when working with electrical components. Before replacing the sensors, disconnect the power to your garage door opener. This can be done by unplugging the opener from the electrical outlet or turning off the breaker that supplies power to the garage door opener. This precautionary step prevents accidental activation of the opener during the sensor replacement process.
Step 3: Remove the Sensors
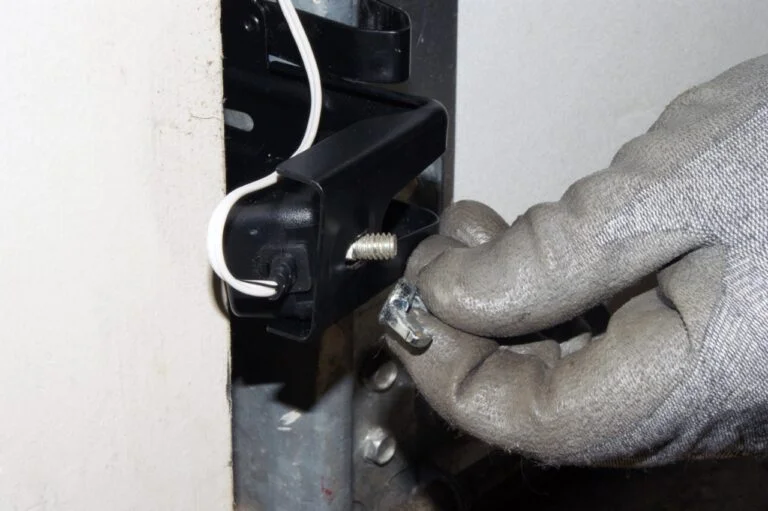
Carefully remove the old sensors from their mounting brackets using a screwdriver. The sensors are typically attached with screws and may have wires connected to them. Take note of how the wires are connected to facilitate the installation of the new sensors. Keeping track of the wiring configuration ensures a smoother transition to the new sensors.
Step 4: Attach the New Safety Sensor Wires
Using wire strippers, carefully strip the insulation from the ends of the wires connected to the new sensors. Match the color-coded wires (usually white and black) to the corresponding wires coming from the garage door opener. Secure the connections by twisting them together and covering them with electrical tape. This prevents the wires from coming loose and ensures a reliable electrical connection.
Step 5: Install the New Sensors
Mount the new sensors onto the brackets, aligning them properly so that they face each other across the garage door opening. Use the screws provided with the new sensors to secure them in place on the mounting brackets. Position the sensors at the same height and angle for optimal performance. Proper alignment is crucial for the sensors to detect obstructions effectively and prevent accidents.
Step 6: Restore the Power
Once the new sensors are securely installed, restore power to the garage door opener. Plug the opener back into the electrical outlet or turn on the breaker that supplies power to the opener. This step enables the sensors to communicate with the opener and ensures they are operational.
Step 7: Line Up the Garage Sensors
Adjust the position of the sensors to ensure they are aligned correctly. They should face each other directly without any obstructions that could interrupt the infrared beam. Proper alignment enhances the sensors’ ability to detect obstacles and maintain safe garage door operation.
Step 8: Test the Installation
After completing the installation, test the new sensors to verify their functionality. Close the garage door using the opener or remote control. Wave an object, such as a broomstick, in front of the sensors to simulate an obstruction. The door should stop closing immediately and reverse its motion upon detecting the obstruction. This test confirms that the sensors are installed correctly and are functioning properly to ensure the safety of your garage door system.
FAQs
How do I know if my garage door sensors need replacement?
You can identify if your garage door sensors need replacement by observing certain signs. If your garage door frequently reverses when closing, the sensors may be misaligned or malfunctioning. Additionally, if the indicator lights on the sensors blink continuously or fail to light up at all, it could indicate an issue. Physical damage, such as cracks or breaks in the sensor casing, is also a clear sign that replacement may be necessary. Regular inspection and testing of the sensors can help catch these issues early and prevent potential safety hazards.
What tools do I need to replace garage door sensors?
To replace garage door sensors, you typically need basic tools such as a screwdriver (usually Phillips and flat-head), wire strippers, electrical tape, and possibly a ladder depending on the height of your garage door sensors. It’s essential to have these tools ready before starting the replacement process to ensure a smooth and efficient installation.
How do I align garage door sensors properly?
Proper alignment of garage door sensors is crucial for their effective operation. Start by ensuring that both sensors are mounted securely on their brackets at the same height and angle. Use a level to confirm they are perfectly aligned horizontally. Clean any dirt or debris that may obstruct the sensor’s view, as this can interfere with the infrared beam. Finally, adjust the sensors so they face each other directly without any gaps or obstructions between them.
Can weather affect garage door sensor performance?
Yes, weather conditions can affect the performance of garage door sensors, particularly extreme temperatures and moisture. Cold temperatures can cause sensors to become sluggish or less responsive, while excessive heat can lead to sensor components overheating. Moisture, such as rain or snow, can also interfere with the infrared beam, causing sensors to malfunction or indicate obstructions incorrectly. It’s essential to keep the sensors clean and periodically inspect them for any signs of weather-related damage to maintain optimal performance.
How do I test my garage door sensors after replacement?
After replacing garage door sensors, testing them is crucial to ensure they function correctly. Close the garage door using the opener or remote control and wave an object, such as a broomstick, in front of the sensors to simulate an obstruction. The door should stop closing and reverse its motion immediately upon detecting the object in the sensor’s path. If the door fails to respond or behaves erratically, double-check the alignment and connections of the sensors. Testing ensures that your garage door operates safely and effectively, providing peace of mind for you and your family.
Conclusion
Replacing garage door sensors is a straightforward process that significantly enhances the safety and efficiency of your garage door system. This guide has provided you with step-by-step instructions to confidently replace sensors when needed, ensuring that your garage door operates smoothly and reliably. Regular maintenance, including sensor checks and alignments, is crucial in preventing accidents and ensuring uninterrupted operation.
After installing new sensors, it’s essential to conduct thorough testing to confirm they function correctly. Testing involves closing the garage door and interrupting the sensor beam to ensure the door stops and reverses as intended. This step verifies that your garage door sensors are properly installed and aligned, providing peace of mind that your garage is secure.
Maintaining your garage door sensors in good condition is vital for the overall security and convenience of your home. Sensors that are well-maintained and promptly replaced when necessary help prevent accidents and protect both your family and belongings. By following these guidelines and staying proactive with sensor maintenance, you can extend the lifespan of your garage door system while ensuring it continues to operate efficiently for years to come.