Setting up your LiftMaster garage door opener is crucial for ensuring smooth functionality and enhancing the security of your home. Whether you’re configuring a standard remote, setting up keypads, or integrating universal remotes, understanding the setup process is fundamental to maximizing the capabilities of your opener. This comprehensive guide offers detailed, step-by-step instructions designed to help you navigate through the setup and troubleshooting procedures of your LiftMaster garage door opener with ease.

By following these instructions carefully, you can efficiently program your opener to suit your specific needs and preferences. Whether you’re a new homeowner setting up a garage door opener for the first time or looking to reprogram your existing system, this guide will equip you with the knowledge and tools necessary to achieve reliable and secure operation.
Understanding the setup process empowers you to make the most out of your LiftMaster garage door opener, ensuring it operates seamlessly and provides peace of mind for your home’s security and convenience.
Tools to Prepare
Aside from your remote or keypad, you may want to prepare some tools before setting up your LiftMaster garage door opener to ensure a smooth installation process. Here are some basic materials that can be helpful during the process:
- Step Ladder: A sturdy step ladder is essential for safely accessing the garage door opener unit, especially if it’s mounted on the ceiling.
- Screwdrivers: Both flathead and Phillips-head screwdrivers are necessary for opening battery compartments, adjusting settings, or installing components securely.
- Cleaning Cloth: A lint-free cloth helps keep surfaces clean, especially when handling sensitive electronic components or cleaning the opener’s sensors.
How to Set LiftMaster Overhead Door Opener Remote
Setting up a LiftMaster overhead door opener remote is a simple process that ensures convenient access to your garage. Follow this detailed step-by-step guide to help you through it:
- Locate the Learn Button: First, find the “Learn” button on your LiftMaster opener unit. This button is typically located near the antenna wire or under the light cover on the motor unit.
- Press the Learn Button: Press and release the “Learn” button. When you do this, the indicator light on the opener unit will illuminate. This light indicates that the opener is now in programming mode and ready to learn a new remote signal.
- Program the Remote: On your remote control, press and hold down the button that you want to use to operate the garage door. Hold it down until you see the indicator light on the opener unit blink. This blinking light confirms that the programming of the remote control to the opener unit is successful.
- Test the Remote: To ensure everything is set up correctly, test the remote by pressing the button you programmed. The garage door should respond by opening or closing, indicating that the remote control is now successfully paired with the LiftMaster opener
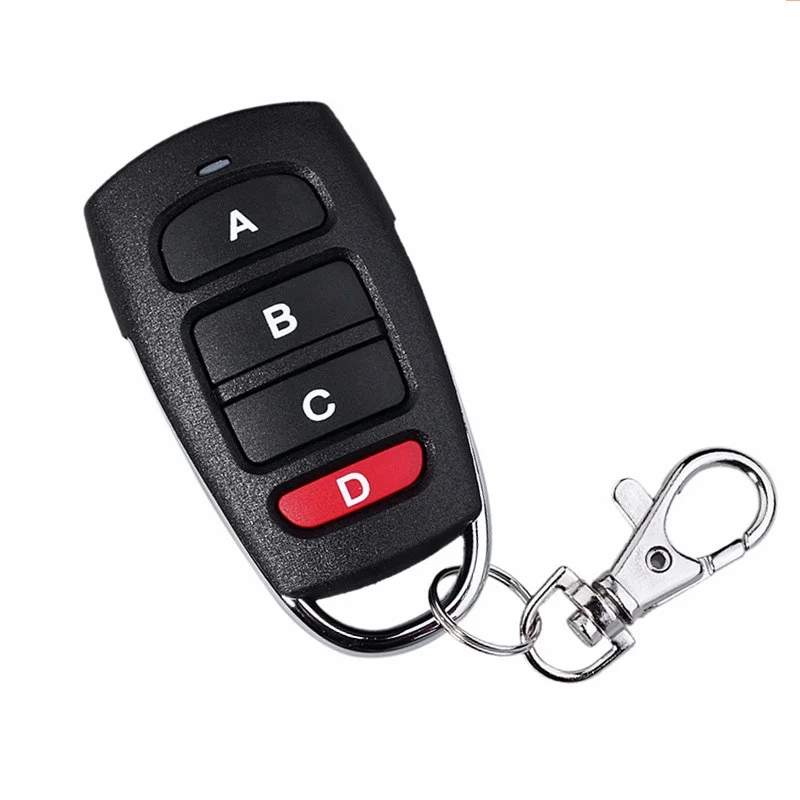
How to Set a Standard LiftMaster Remote
Setting up a standard LiftMaster remote is a straightforward process that ensures the efficient operation of your garage door opener. Here’s what to do:
- Ensure Power: Make sure the LiftMaster opener unit is powered on and functioning properly before proceeding with the setup.
- Locate the Learn Button: Find the “Learn” button on the LiftMaster opener unit. Typically, this button is located near the antenna wire or under the light cover on the motor unit.
- Press and Release the Learn Button: Press and release the “Learn” button on the opener. This action activates the programming mode, indicated by the opener’s light blinking or staying on steadily.
- Program the Remote: Now, on your LiftMaster remote, hold down the button that you want to use to operate the garage door. Hold it down until you see the opener’s light blink or change its status. This indicates that the remote signal has been successfully learned by the opener.
- Test the Remote: To confirm that the programming was successful, test the remote by pressing the button you programmed. The garage door should respond by opening or closing as intended.
How to Set a Keypad or Universal Remote
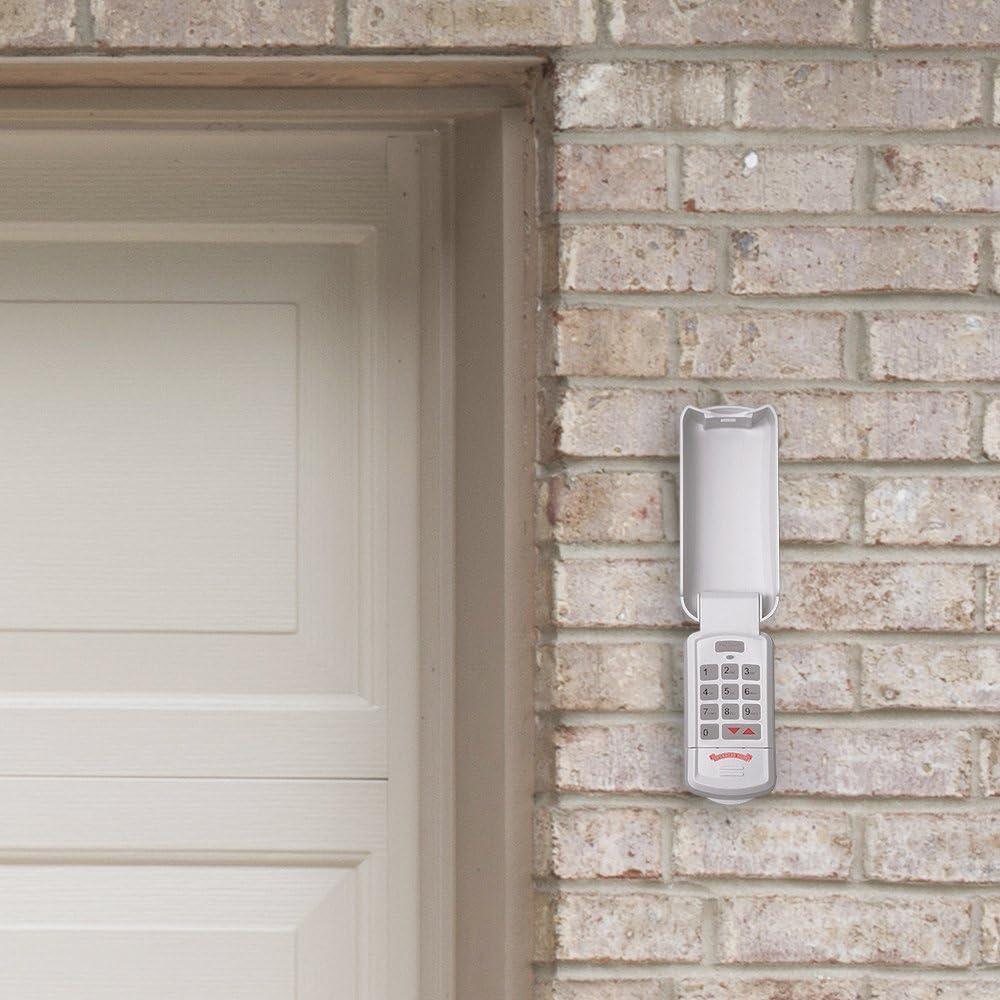
Setting up a keypad or universal remote with your LiftMaster garage door opener involves a few simple steps to ensure seamless integration and functionality:
- Enter Programming Mode: Begin by accessing the programming mode on your LiftMaster garage door opener. Locate the “Learn” button on the opener unit, typically found near the antenna wire or under the light cover. Press and release this button to initiate the programming mode. The indicator light on the opener will illuminate or blink, indicating it’s ready to learn a new device.
- Follow Manufacturer Instructions: Each keypad or universal remote may have specific instructions for syncing with the opener. Refer to the user manual provided with your device to proceed with the programming steps. This usually involves entering a specific code sequence or pressing buttons in a prescribed order to transmit the programming signal to the opener.
- Test Functionality: Once programmed, test the keypad or universal remote to ensure it operates the garage door opener correctly. Press the programmed buttons on the device and observe if the opener responds by activating the garage door. This step verifies that the device is synced and functioning as intended.
Setting Your Liftmaster Garage Door Opener to Your Car
Programming your LiftMaster garage door opener to your car enables convenient access to your garage directly from your vehicle. This process ensures seamless operation and enhances the security of your home.
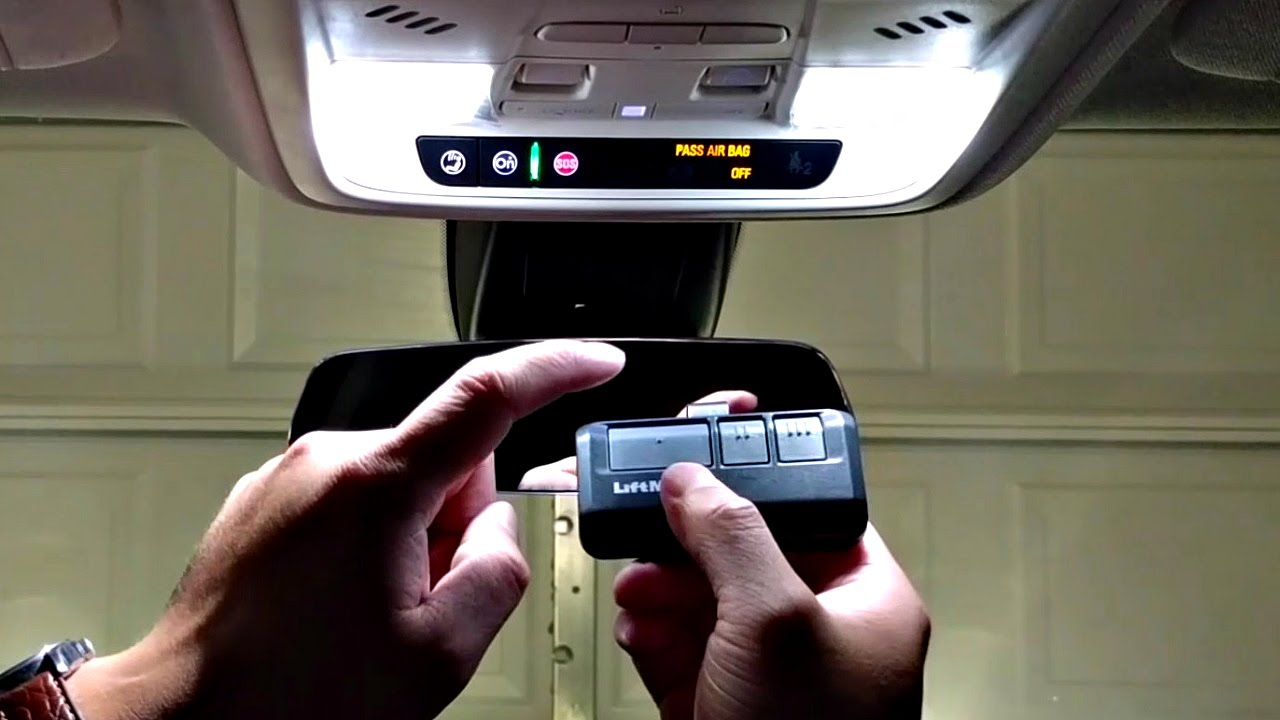
Here’s a detailed guide to walk you through the steps:
- Locate the Learn Button: Find the “Learn” button on your LiftMaster opener unit, usually near the antenna wire or under the light cover. Press and release it to put the opener into programming mode.
- Access Your Car’s Opener Controls: Inside your car, locate the button used to program new garage door opener codes. It’s typically near the rearview mirror, overhead console, or integrated into the dashboard.
- Sync Your Car’s Opener: Press and hold the programming button in your car until the indicator light on the LiftMaster opener blinks. This action sends a signal to program the opener to communicate with your vehicle.
- Test the Connection: After programming, test by pressing the programmed button in your car. If the garage door opens or closes, the programming is successful.
- Repeat if Necessary: For additional vehicles or remotes, repeat steps 1-4 to ensure each is programmed to operate with the LiftMaster opener.
Some Troubleshooting Issues
When setting up a LiftMaster opener, several common troubleshooting issues may arise, requiring attention to ensure smooth functionality:
- Remote Not Syncing: If your remote fails to sync with the opener, check its proximity to the opener. Reposition the remote closer to the opener and repeat the programming process. Ensure no obstructions are blocking the signal path.
- Interference: Sometimes, other electronic devices or metal objects near the opener can interfere with its signals. Remove any potential sources of interference and attempt to program the remote again.
- Keypad Malfunction: If the keypad isn’t functioning properly, replace its batteries with fresh ones. Reset the keypad by removing and reinserting the batteries, then reprogram it according to the manufacturer’s instructions.
- Opener Not Responding: Verify that the opener unit is receiving power. Check the power source and connections to ensure they are secure and undamaged. If necessary, reset the opener by unplugging it for a few minutes and then plugging it back in.
- Light Cover Issues: After programming, ensure the light cover on the opener is securely closed. A loose or improperly closed cover can interfere with the opener’s operation.
Enhanced Features and Programming for Your LiftMaster Opener
Additional features not only enhance the functionality of your LiftMaster garage door opener but also offer increased security, convenience, and control over your garage access. Below are some of these advanced functionalities available with your LiftMaster garage door opener:
- Timer-to-Close: This feature allows you to set your garage door to automatically close after a predetermined period. It enhances convenience and security by ensuring your garage door is never left open unintentionally.
- Security+ 2.0: With enhanced security features, Security+ 2.0 technology helps prevent code theft and unauthorized access. It uses a rolling code system that generates a new code each time the remote control is used, ensuring your garage remains secure.
- MyQ Technology: Enjoy remote access and monitoring of your garage door opener through the MyQ smartphone app. This technology allows you to check the status of your garage door, open or close it remotely, and receive alerts on your mobile device, providing peace of mind and convenience wherever you are.
FAQs:
Can I program my LiftMaster garage door opener remote without the original remote?
Yes, you can program a new LiftMaster garage door opener remote even if you don’t have the original remote. To do this, you’ll typically need to access the “Learn” button on the opener unit itself. Follow the specific instructions in your LiftMaster opener’s manual for entering programming mode without the original remote. Once in programming mode, you can synchronize the new remote with the opener by pressing the appropriate button on the new remote until the indicator light on the opener blinks or confirms the programming. This process allows you to add new remotes or replace lost ones without the need for the original remote control.
Why is my LiftMaster remote not working?
If your LiftMaster remote isn’t working, start by checking the batteries to ensure they are properly inserted and not depleted. Next, confirm that the remote is programmed correctly according to the instructions in the manual. If the remote still doesn’t function, reprogram it by following the setup procedure outlined by LiftMaster to establish a new connection with the opener.
Can I set up several remote controls for my LiftMaster opener?
Yes, your LiftMaster opener allows you to program numerous remotes. Simply press the “Learn” button on the opener unit and within a brief time window, press the button on each remote you wish to program. The opener will learn and store the signals from each remote, allowing them to operate the garage door independently.
What should I do if my keypad is not accepting my code?
If your LiftMaster keypad isn’t accepting your code, first ensure it’s within range of the opener. Verify that you are entering the correct PIN and that the keypad’s batteries are functioning. If issues persist, reset the keypad by removing and reinserting the batteries. Reprogram the keypad following the manufacturer’s instructions to ensure it communicates correctly with the opener.
How do I adjust the force settings on my LiftMaster opener?
Adjusting the force settings on your LiftMaster opener ensures the garage door opens and closes smoothly without excessive force. Consult your opener’s manual for specific instructions on accessing the force adjustment settings. Typically, adjustments involve turning knobs or using digital controls on the opener unit itself. Fine-tune the force settings according to the manual’s recommendations to maintain safe and efficient door operation.
Conclusion
In conclusion, setting up your LiftMaster garage door opener ensures not only convenience but also enhances the security and functionality of your home. Regular maintenance and staying updated with manufacturer guidelines and updates are essential practices to maximize the longevity and efficiency of your opener. By following these steps and addressing any issues promptly, you can maintain smooth operation and enjoy the peace of mind that comes with a well-functioning garage door opener.
End Note
Setting up your LiftMaster garage door opener is crucial for optimizing its functionality and ensuring consistent performance. Whether you’re troubleshooting issues or programming additional features, consulting the manufacturer’s manual is essential. For more complex problems or specific programming needs, contacting LiftMaster customer support can provide expert guidance and assistance.
Regular maintenance is key to keeping your garage door opener in top condition. Perform routine checks on components such as batteries, sensors, and lubrication to prevent issues and extend the lifespan of your opener. Stay updated with any software or firmware updates released by LiftMaster to enhance security and performance.
By taking these steps, you can enjoy the convenience and security that your LiftMaster garage door opener offers. It’s a valuable investment in your home’s safety and functionality, ensuring smooth operation for years to come.