Resetting your garage door opener after pulling the emergency release cord can seem like a daunting task, but with the right steps, it can be done quickly and safely. This guide will walk you through the process of resetting your garage door opener, ensuring that it operates smoothly once more. Whether you’ve pulled the cord intentionally during an emergency or accidentally, understanding how to reset it is essential for maintaining the security and functionality of your garage door.
The emergency release cord is a crucial feature of your garage door system, allowing you to manually operate the door in case of power outages or mechanical failures. However, once the cord is pulled, the door becomes disengaged from the opener, necessitating a reset to restore automatic operation. This guide covers all the necessary steps, from ensuring safety to troubleshooting common issues, helping you to confidently reset your garage door opener and keep it in optimal working condition. With a little knowledge and effort, you can master this important maintenance task and ensure your garage door remains reliable and secure.
Why You Need to Reset Your Garage Door Opener After Pulling the Cord
The emergency release cord is an important safety feature that allows you to manually operate your garage door in case of a power outage or mechanical failure. However, once the cord is pulled, the door is disconnected from the opener. To restore normal operation, you need to reset the system. Resetting the garage door opener ensures that the door can be operated automatically, providing convenience and maintaining security.
Tools to Prepare
Before starting the reset process, gather the necessary tools. While you typically won’t need many, having the following items on hand can make the task easier and safer:
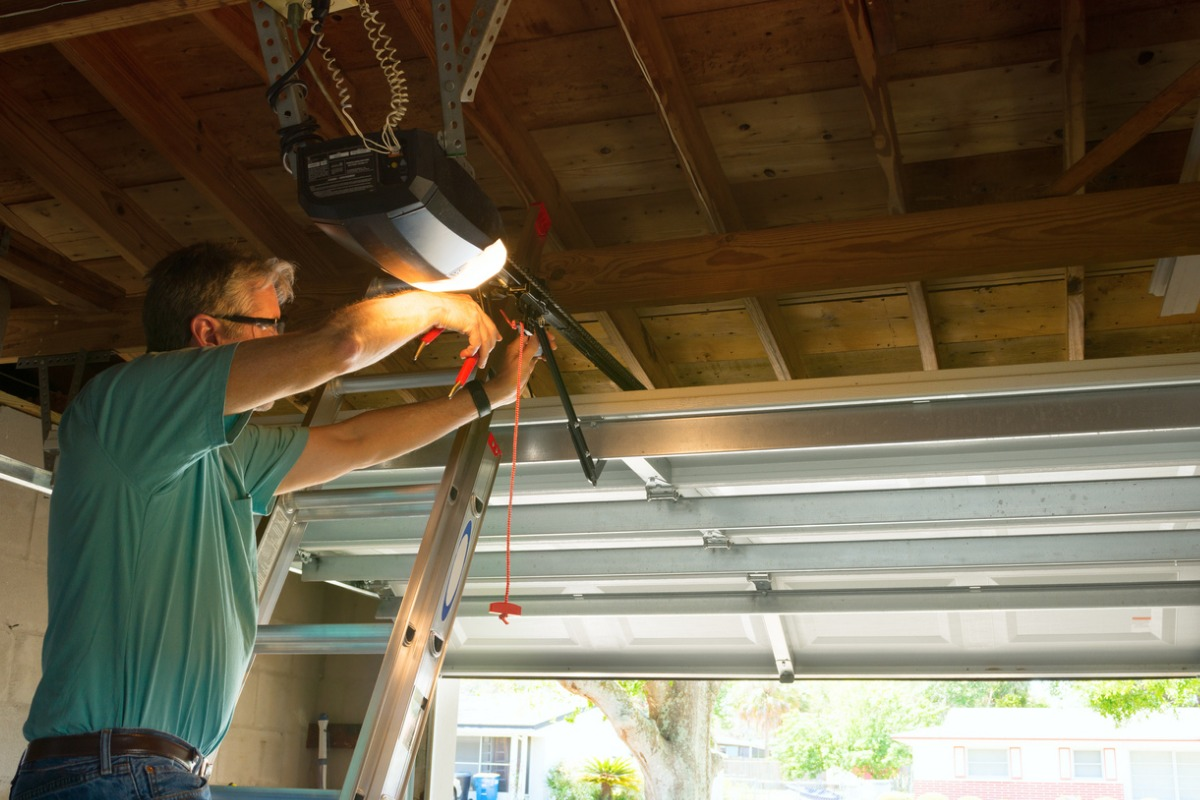
- Ladder: A sturdy ladder is essential for reaching the garage door opener mechanism, especially if it is mounted high on the ceiling. Ensure the ladder is stable and positioned securely to avoid any accidents.
- Flashlight: A flashlight is useful for illuminating dark areas, such as the garage ceiling or the inner workings of the opener mechanism. Good visibility is crucial for accurately identifying parts and performing the reset steps safely.
- Garage Door Opener’s Manual: Your garage door opener’s manual provides specific information about your model, including detailed instructions for resetting the emergency release mechanism. Having the manual on hand can help you understand the nuances of your particular opener and troubleshoot any issues that arise.
Safety Precautions
Wearing Protective Gear
Wearing protective gear is essential when working with garage door openers. Safety glasses protect your eyes from dust and debris that may fall while adjusting or repairing the opener. Gloves provide a better grip on tools and protect your hands from sharp edges and pinch points. Depending on the task, wearing a hard hat may also be advisable to protect your head from any falling objects or components.
Ensuring Proper Lighting
Proper lighting is crucial for safely performing any maintenance or repairs on your garage door opener. Ensure that your work area is well-lit to see all components and avoid mistakes. Using a flashlight or a portable work light can help illuminate hard-to-reach areas and prevent accidents caused by poor visibility. Good lighting ensures you can accurately follow the reset and maintenance steps without overlooking critical details.
Keeping Children and Pets Away During Maintenance
Keeping children and pets away from the work area is vital to ensure their safety and yours. The garage door and its components can be hazardous, especially during maintenance or repair tasks. Ensure the area is secure and inform family members to stay clear while you are working. This precaution prevents distractions and accidents, such as children or pets inadvertently triggering the door or coming into contact with tools and equipment.
Safe Handling of Tools and Equipment
Safe handling of tools and equipment is essential to avoid injuries. Use the correct tools for each task and ensure they are in good condition. Follow the manufacturer’s instructions for your garage door opener and any tools you are using. Keep a firm grip on tools, especially when working on a ladder or at heights. Store tools properly when not in use to prevent tripping hazards. Additionally, always disconnect the garage door opener from the power source before starting any maintenance or repairs to prevent accidental activation.
How to Reset Garage Door Opener After Pulling Cord
Resetting your garage door opener after pulling the emergency release cord is a straightforward process that ensures your door can resume automatic operation. Whether you pulled the cord during an emergency or by accident, following these steps will help you safely and effectively reset your garage door opener.
This guide provides detailed instructions to ensure your garage door operates smoothly and reliably once again.
Step 1: Ensure Safety First
Safety should always be your top priority. Make sure to unplug the garage door opener to prevent any accidental activation during the reset process. Additionally, ensure that the area around the garage door is clear of any obstructions.
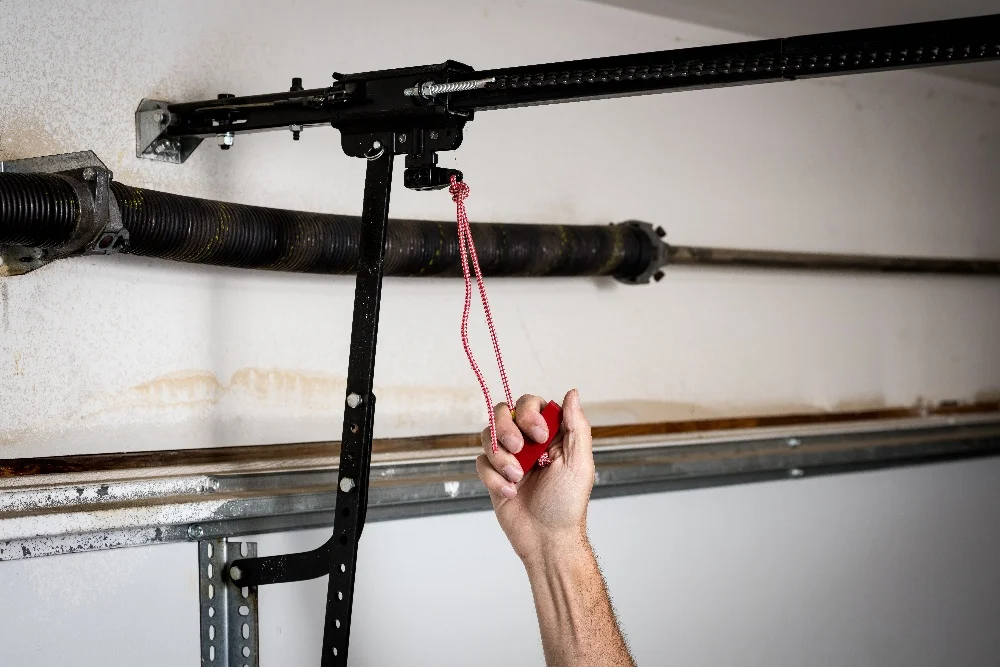
Step 2: Locate the Emergency Release Cord
Resetting your garage door opener after pulling the emergency release cord is a straightforward process that ensures your door can resume automatic operation. Whether you pulled the cord during an emergency or by accident, following these steps will help you safely and effectively reset your garage door opener.
Step 3: Close the Garage Door
If the garage door is open, carefully close it manually. This will make it easier to re-engage the opener. Ensure the door is fully closed to avoid any complications during the reset process.
Step 4: Manually Re-engage the Garage Door Opener
To re-engage the garage door opener, pull the emergency release cord towards the garage door opener motor. This action should reattach the trolley to the carriage. You might hear a click indicating that the trolley has been re-engaged.
Step 5: Restore Power and Test the Opener
Once the trolley is re-engaged, plug the garage door opener back into the power source. Use the remote control or wall switch to test the opener. The door should open and close smoothly. If it doesn’t, you may need to repeat the steps or consult your garage door opener’s manual for additional troubleshooting tips.
Troubleshooting Common Issues
Opener Doesn’t Respond After Reset
If the garage door opener doesn’t respond after you’ve reset it, ensure that the opener is properly plugged in and that there is power to the outlet. Check the remote control batteries and make sure the opener’s antenna is not damaged.
Garage Door Operates Erratically or Makes Unusual Noises
If your garage door operates erratically or makes unusual noises after resetting, it could indicate an issue with the alignment of the tracks or the opener itself. Inspect the tracks for any obstructions or damage, and ensure the opener is securely mounted. Lubricating the moving parts of the door can also help reduce noise and improve operation.
Frequently Asked Questions (FAQs)
What should I do if the emergency release cord is stuck?
If the emergency release cord is stuck, avoid forcing it, as this could cause damage. Begin by inspecting the cord and its surroundings for any obstructions or tangles. Sometimes, debris or dirt can accumulate and cause the cord to jam. For detailed instructions unique to your model, check the owner’s manual for your garage door opener. The manual may offer troubleshooting steps or guidance on how to safely address the issue. If you’re unable to resolve the problem or if the cord remains stuck, it’s best to contact a professional technician who can safely and effectively fix the issue.
Can I reset the garage door opener myself, or do I need a professional?
Resetting a garage door opener is generally a simple process that most homeowners can perform themselves. It involves ensuring safety, locating the emergency release cord, manually closing the garage door, re-engaging the opener, and testing the system. However, if you encounter difficulties during any step or feel unsure about how to proceed, consulting a professional is advisable. A technician can not only reset the opener efficiently but also identify and address any underlying issues that might need attention. This ensures the process is completed safely and prevents potential damage or injury.
How often should I test the emergency release mechanism?
Testing the emergency release mechanism at least once a year is recommended to ensure it functions properly. Regular testing is crucial to ensure that the mechanism will work correctly during an emergency, such as a power outage or mechanical failure. To test, pull the emergency release cord to disengage the door from the opener, then manually open and close the door to check for smooth operation. Afterward, re-engage the opener and test the automatic function. This routine check can help identify potential issues early, allowing you to address them before they become serious problems affecting your garage door’s safety and reliability.
What if the garage door doesn’t stay closed after resetting?
If your garage door doesn’t stay closed after resetting, several factors could be at play. First, check the alignment of the sensors near the base of the door tracks, as misaligned sensors can prevent the door from closing properly. Inspect the tracks for any obstructions or damage that could interfere with the door’s movement. Ensure the door is balanced correctly by lifting it halfway and seeing if it stays in place. If these checks don’t resolve the issue, there may be a more serious underlying problem. In such cases, it is advisable to call a professional technician to diagnose and fix the issue.
Is it normal for the garage door opener to make noise during operation?
Some noise is normal during the operation of a garage door opener, especially with chain drive systems, which are generally louder than belt or screw drive systems. However, excessive or unusual noises can indicate potential problems. Regular maintenance can help reduce noise and ensure smooth operation. Lubricate all moving parts, including tracks, rollers, and hinges, to minimize friction and noise. Tighten any loose hardware that might cause rattling or clanking sounds. If the noise persists despite these efforts, it could signal a more serious issue, such as worn-out parts or an imbalanced door. In such cases, consulting a professional technician is recommended to diagnose and address the problem.
End Note
Resetting your garage door opener after pulling the cord is an essential skill for maintaining the functionality and security of your garage. By carefully following the steps outlined in this guide, you can restore your garage door’s automatic operation and address any common issues that may arise. Regular maintenance and attention to detail can prevent many problems, ensuring that your garage door operates smoothly and reliably. Key steps include ensuring safety, locating the emergency release cord, manually closing the door, re-engaging the opener, and testing the system.
If you encounter any difficulties or uncertainties during the reset process, don’t hesitate to seek professional assistance. A qualified technician can diagnose and resolve more complex issues, providing peace of mind and ensuring the longevity of your garage door system. Regular check-ups and professional maintenance can also help identify potential problems early, keeping your garage door in optimal condition and enhancing the overall security of your home.